Looking for an easy hairstyle that looks stylish without requiring hours in front of the mirror? A messy bun is a perfect choice. It’s simple, versatile, and suitable for almost any occasion. Whether you’re getting ready for work, going out with friends, attending a casual event, or relaxing at home, this effortless hairstyle can help you look put together in just a few minutes.
The best part about a messy bun is that it doesn’t need to look perfect. A few loose strands, natural volume, and a slightly undone finish are what make this hairstyle so attractive. You also don’t need professional hairstyling skills or expensive tools to create one.
If you’re a beginner, learning how to create a messy bun is easier than you might think. With a few basic accessories and the right technique, you can create a beautiful hairstyle that suits your hair length and texture.
In this step-by-step guide, we’ll explain how to make a messy bun, explore different styling techniques, and share practical tips to help your hairstyle look fuller and stay in place throughout the day.
What Is a Messy Bun?
A messy bun is a relaxed hairstyle in which the hair is gathered, twisted, and secured into a bun. Unlike a traditional sleek bun, this style features loose strands, soft texture, and natural-looking volume.
It creates an effortless appearance without looking overly styled. You can wear it high on your head, low near your neck, or somewhere in between, depending on your personal preference.
Messy buns are popular because they work with different hair types and can be styled for casual or more formal occasions.
Some popular variations include:
- High messy bun
- Low messy bun
- Half-up messy bun
- Braided messy bun
- Claw clip messy bun
- Messy bun with face-framing strands
What You Need to Create a Messy Bun
Before starting, gather a few basic hair accessories. Most of these items are probably already in your beauty collection.
Essential messy bun styling tools:
- Hairbrush or wide-tooth comb
- Soft hair tie
- Bobby pins
- Satin or velvet scrunchie
- Texturizing spray
- Lightweight hairspray
- Decorative hair clips (optional)
You don’t need to use every product. A hair tie and a few bobby pins are usually enough to create a simple messy bun.
If your hair is naturally smooth or slippery, texturizing spray can help provide extra grip and make styling easier.
How To Create a Messy Bun: Step-by-Step Guide
Follow these simple steps to create a classic messy bun at home. This technique works particularly well for medium-length and long hair.
Step 1: Prepare Your Hair
Start by gently brushing your hair to remove tangles. You can create a messy bun on freshly washed, completely dry hair or second-day hair.
If your hair is naturally straight and silky, apply a small amount of texturizing spray or lightweight mousse. This can help create more grip and prevent the bun from slipping.
Avoid using too much styling product because it may make your hair look heavy or greasy.
Beginner tip: Don’t brush your hair too aggressively if you want a naturally textured finish. Finger-combing can also help create a relaxed appearance.
Step 2: Decide Where You Want Your Bun
Before gathering your hair, decide whether you prefer a high, medium, or low messy bun.
- High messy bun: Creates a playful and casual appearance.
- Medium messy bun: Offers a balanced look suitable for everyday wear.
- Low messy bun: Looks softer and more elegant, especially for formal occasions.
For beginners, a high messy bun is a great place to start because it’s easy to create and adjust.
Step 3: Gather Your Hair Into a Ponytail
Use your fingers to gather your hair into your chosen position.
Instead of brushing everything tightly against your scalp, keep the hair slightly loose. This helps create the natural volume that makes a messy bun look attractive.
Secure the gathered hair with a soft hair tie.
You don’t need to make the ponytail perfectly smooth. A few natural bumps and loose sections are completely fine.
Step 4: Create Volume Around the Crown
A little extra volume can make your messy bun look fuller and more stylish.
Gently pull small sections of hair around the crown of your head. Work slowly and avoid pulling too much hair out of the ponytail.
If you want additional volume, lightly tease the ponytail using a comb. However, avoid excessive backcombing because it can create tangles and damage your hair.
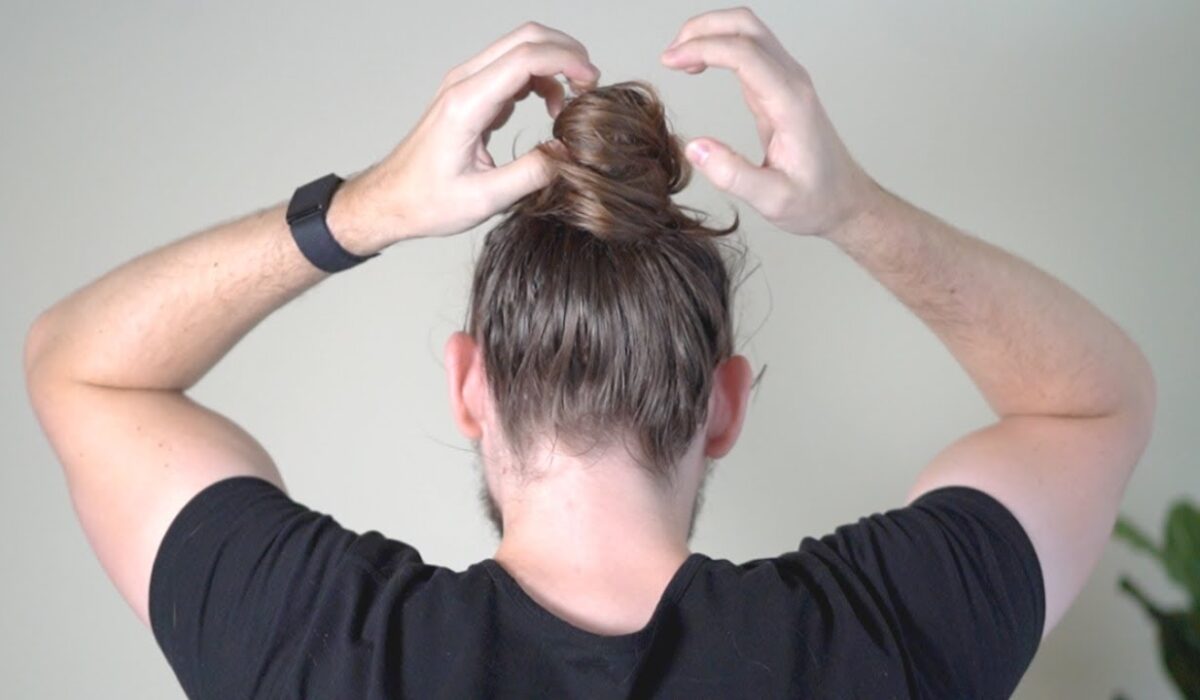
Step 5: Twist Your Ponytail
Take the ponytail and twist it loosely in one direction.
You don’t need to twist the hair too tightly. A relaxed twist creates a softer bun with more natural texture.
If you have thick or very long hair, you can divide your ponytail into two sections and twist them separately.
Step 6: Wrap Your Hair Into a Bun
Once you’ve twisted your ponytail, begin wrapping it around the base of the hair tie.
Continue wrapping until you form a bun shape. You can leave some ends sticking out slightly to create the classic messy appearance.
Don’t worry if the bun looks uneven at this stage. You can adjust the shape later.
Step 7: Secure the Bun With Bobby Pins
Use bobby pins to secure the bun around its base.
Insert the pins into loose sections and anchor them against the hair underneath. Add more pins wherever the bun feels unstable.
If your hair is thick, you may need additional pins to keep everything in place.
Choose bobby pins that match your hair color for a more natural finish.
Step 8: Pull Out a Few Loose Strands
This is the step that gives a messy bun its signature look.
Gently pull out a few small strands near your temples, ears, and neck. These face-framing pieces create a softer and more relaxed hairstyle.
You can also loosen a few sections around the bun to make it look fuller.
Avoid pulling out too much hair, as this may make the hairstyle lose its shape.
Step 9: Adjust the Shape of Your Bun
Look at your hairstyle from different angles and make small adjustments.
If the bun looks too tight, gently loosen it with your fingers. If it looks uneven, reposition a few strands and add extra bobby pins.
The goal is to create a balanced hairstyle that looks naturally undone rather than perfectly polished.
Step 10: Finish With Hairspray
Once you’re happy with the shape, finish with a light mist of flexible-hold hairspray.
This can help control flyaways and keep your hairstyle in place without making it feel stiff.
If you prefer a softer look, skip heavy styling products and allow a few natural strands to remain loose.
Your messy bun is ready!
5 Easy Messy Bun Variations to Try
Once you’ve mastered the classic messy bun, you can experiment with different styles.
1. High Messy Bun
<IMAGE_PLACEHOLDER />
A high messy bun is perfect for everyday styling. Gather your hair near the crown, twist it into a loose bun, and secure it with pins.
It works especially well with casual outfits and relaxed weekend looks.
2. Low Messy Bun
<IMAGE_PLACEHOLDER />
A low messy bun sits near the nape of your neck and creates a more elegant appearance.
Follow the same twisting and wrapping technique, but position your ponytail lower. Add a few loose strands around your face for a romantic finish.
3. Half-Up Messy Bun
<IMAGE_PLACEHOLDER />
The half-up messy bun is ideal if you prefer wearing your hair down.
Take the upper section of your hair, gather it into a small ponytail, and twist it into a bun. Secure it with a hair tie or bobby pins while leaving the rest of your hair loose.
4. Braided Messy Bun
<IMAGE_PLACEHOLDER />
A braided messy bun adds texture and detail to a simple hairstyle.
Start by creating a ponytail and making a basic three-strand braid. Wrap the braid around its base and secure it with bobby pins.
Gently loosen a few sections to create a softer finish.
5. Claw Clip Messy Bun
<IMAGE_PLACEHOLDER />
A claw clip messy bun is one of the quickest ways to style your hair.
Gather your hair at the back, twist it upward, and fold the ends toward your head. Secure the twisted section with a claw clip.
Adjust the loose strands to create your preferred shape.
How to Create a Messy Bun for Different Hair Types
Your hair texture and length can influence how easily you create a messy bun. Here are some helpful techniques for different hair types.
Messy Bun for Fine Hair
Fine hair can sometimes look flat when gathered into a bun. To create more volume, use lightweight texturizing spray before styling.
You can also gently tease the ponytail or use a small bun accessory to create a fuller appearance.
Avoid heavy creams and oils that may weigh down your hair.
Messy Bun for Thick Hair
Thick hair naturally creates volume, but it can be more difficult to secure.
Try dividing your ponytail into two sections before twisting. Wrap each section around the base and secure it with strong bobby pins.
A sturdy hair tie can also help prevent the bun from becoming loose.
Messy Bun for Short Hair
Creating a full messy bun with short hair can be challenging, but there are still plenty of options.
Try a half-up messy bun, a mini bun, or a claw clip hairstyle. Small bobby pins can help secure shorter strands around the sides and back.
Messy Bun for Long Hair
Long hair is ideal for experimenting with different messy bun styles.
You can create oversized high buns, braided buns, or elegant low buns. If your hair is very long, divide it into sections before wrapping to make the bun easier to control.
Messy Bun for Curly Hair
Naturally curly hair can create beautiful volume and texture.
Apply a little leave-in conditioner if needed, gather your curls gently, and secure the bun without pulling too tightly.
Allow some natural curls to fall around your face for a soft, effortless appearance.
Tips to Make Your Messy Bun Look Fuller
A beautiful messy bun doesn’t need to be complicated. A few small styling adjustments can make a noticeable difference.
- Use texturizing spray: It adds grip and can help fine hair hold its shape.
- Avoid tight styling: A relaxed ponytail creates a softer appearance.
- Add gentle volume: Loosen small sections around the crown.
- Choose the right placement: High buns look playful, while low buns feel more elegant.
- Use enough bobby pins: Secure the bun without making it uncomfortable.
- Leave a few loose strands: Face-framing pieces create a naturally relaxed finish.
- Try a scrunchie: Satin or velvet scrunchies can add a stylish finishing touch.
Common Messy Bun Mistakes to Avoid
Even a simple hairstyle can become frustrating if you make a few common styling mistakes.
Making the ponytail too tight: Pulling your hair too tightly can create unnecessary tension and make the bun look less relaxed.
Using too many styling products: Heavy products can make your hair look greasy and reduce natural volume.
Skipping proper securing: A loosely wrapped bun may fall apart if you don’t use enough bobby pins.
Pulling out too many strands: A few loose pieces look stylish, but too many can make the hairstyle appear unfinished.
Using rough hair accessories: Tight elastic bands and rough clips can snag your hair and contribute to breakage.
Over-brushing the finished bun: Excessive brushing can remove texture and make your hairstyle look flat.
How to Make Your Messy Bun Stay in Place All Day
If your messy bun keeps falling apart, try these practical tips:
- Start with hair that has a little natural texture.
- Use a secure but comfortable hair tie.
- Twist your hair evenly before wrapping it around the base.
- Place bobby pins around the bun to hold loose sections.
- Choose accessories that are suitable for your hair thickness.
- Finish with flexible-hold hairspray.
- Avoid constantly touching or adjusting your hairstyle.
If your hair is particularly thick or long, using a few extra pins can make the bun more secure.
When Can You Wear a Messy Bun?
One of the best things about a messy bun is its versatility. You can easily adjust the hairstyle to suit different occasions.
- For work: Choose a low messy bun with a simple middle part.
- For college: Try a high messy bun or half-up style.
- For casual outings: A claw clip messy bun is quick and stylish.
- For parties: Add decorative clips or try a braided messy bun.
- For weddings: Choose a soft low bun with delicate hair accessories.
- For everyday activities: A simple high bun keeps your hair away from your face.
With a few changes in placement and accessories, the same basic hairstyle can create several different looks.
Final Thoughts
Learning how to create a messy bun is an easy way to add a stylish and practical hairstyle to your everyday beauty routine. Whether you prefer a high messy bun, an elegant low bun, a half-up hairstyle, or a quick claw clip look, there are plenty of options to explore.
The secret is to keep the styling process simple. Prepare your hair, create a loose ponytail, twist and wrap the hair, secure it with bobby pins, and finish with a few relaxed strands.
Remember that a messy bun doesn’t need to look perfect. Its natural texture, soft volume, and slightly undone finish are what make it beautiful.
With a little practice and the right accessories, you can create a gorgeous messy bun in just a few minutes. Experiment with different styles and find the look that makes you feel comfortable and confident.